
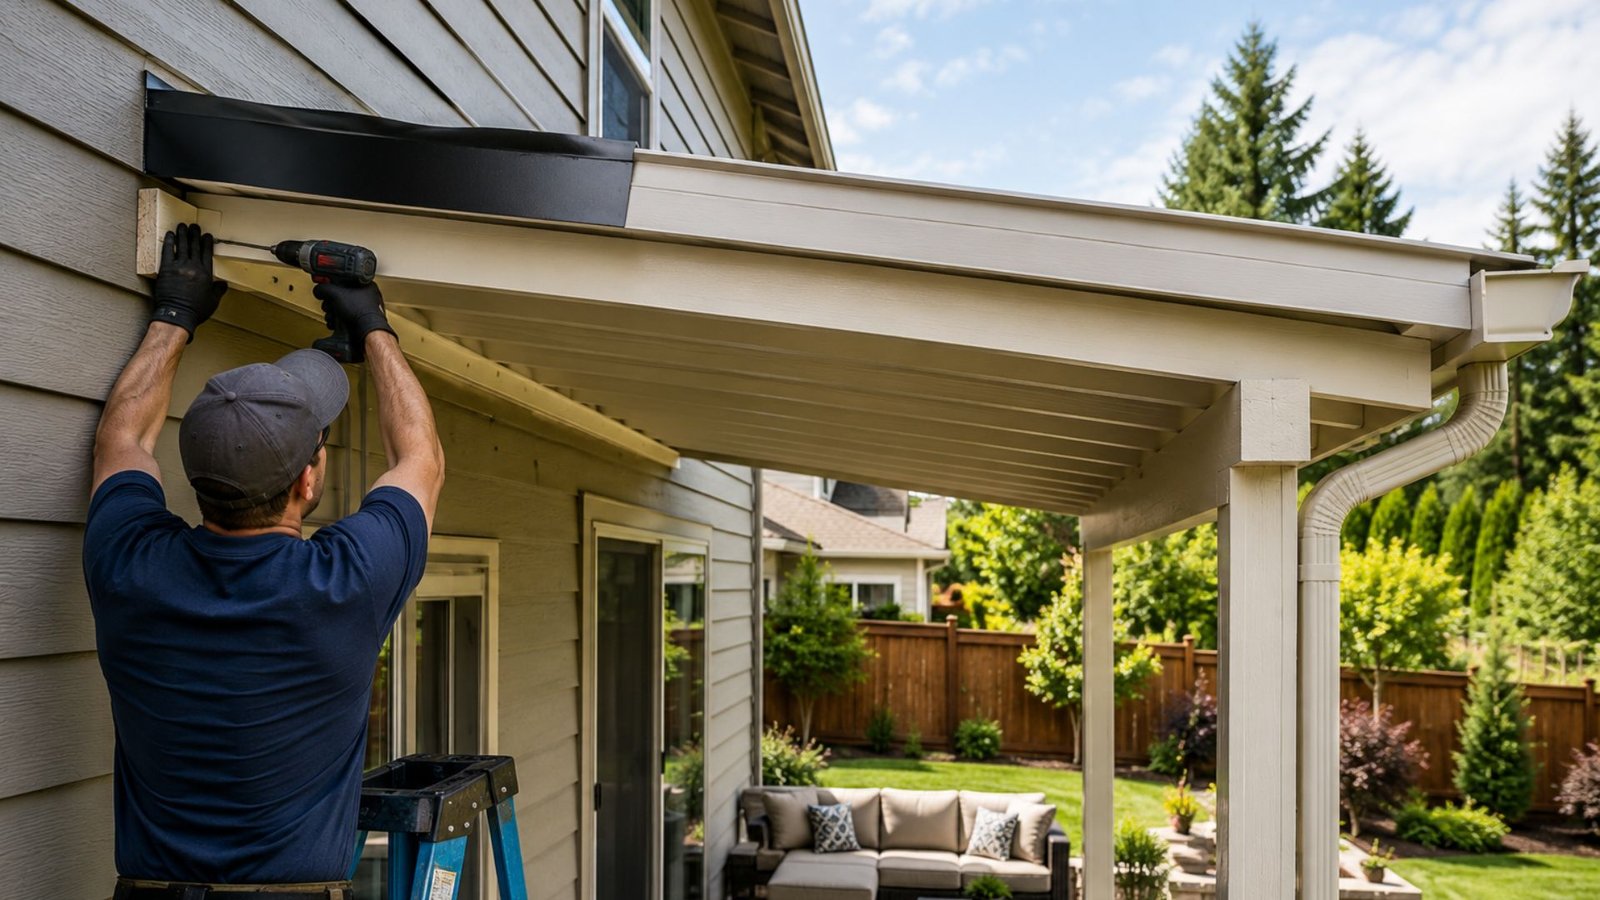
Adding a patio cover to your home is one of the most rewarding upgrades you can make. It extends your living space, adds shade, and gives your backyard a polished, finished look. But there is one problem that trips up homeowners and even some contractors: leaks.
When a patio cover is attached to your home incorrectly, water finds its way in through the connection point. Over time, that moisture damages your wall, your drywall, your roof structure, and your peace of mind. The good news is that with the right approach, this is entirely preventable.
Why the Ledger Connection Is Everything
The ledger is the horizontal beam that gets fastened directly to your house wall. It is the backbone of an attached patio cover, and it is where most leaks start.
If the ledger is installed without proper flashing or is placed too low relative to the eaves, water pools right there. In Dallas, where summer storms hit hard and fast, that standing water turns into a serious problem quickly.
Getting the ledger right means choosing the correct height on the wall, using the right fasteners-typically heavy-duty structural screws or bolts-and applying waterproof flashing before any wood or aluminum goes up.
How to Flash the Ledger Board Correctly
Flashing is the thin layer of material installed between the ledger and your house to redirect water away from the wall. Think of it as a water diverter built directly into the structure.
Here is how a properly flashed ledger is installed:
- Remove any siding or roofing material – including asphalt shingles or roof tiles – in the area where the ledger will sit.
- Apply a layer of bituminous waterproofing membrane directly to the wall sheathing.
- Install Z-flashing above the ledger so water runs over and away from the connection point.
- Fasten the ledger through the flashing and into the structural wall framing with lag screws or structural bolts.
- Replace or trim the siding so it laps over the top of the flashing without trapping moisture behind it.
Skipping even one of these steps is what leads to rot, mold, and expensive repairs down the road.
Choosing the Right Structure: Wood, Steel, or Aluminum
The material you choose affects both the performance and aesthetics of your patio cover. Each has its place depending on your budget, design goals, and how the cover connects to your home.
- Timber framing is popular because it looks natural and blends well with most home styles. A wood beam and rafter system gives a traditional look, but wood requires regular sealing to handle Dallas humidity and rain. If the wood sits too close to moisture at the ledger point without proper treatment, it will eventually rot.
- Steel offers incredible strength, especially for longer spans. A steel beam can handle significant load without the bulk of timber, which is great for cleaner sightlines and modern design. Steel is also less prone to warping or rot, making it a solid choice for a permanent structure.
- Aluminum is lightweight, rust-proof, and low maintenance. It is a common choice for prefabricated patio covers and works well in structures where weight and corrosion resistance matter most.
Roof Pitch, Drainage, and Ventilation
One of the most overlooked details in patio cover construction is roof pitch. Even a small slope – usually a minimum of a quarter inch per foot – is enough to move water off the roof surface and away from your house.
A flat or near-flat roof is asking for trouble. Water that does not drain properly sits against the flashing, works its way under the roof shingles or panels, and eventually penetrates the structure. Proper domestic roof construction principles apply here just as much as they do on your main home.
Ventilation also matters. A patio cover attached to the eaves or fascia of your home needs airflow to prevent condensation buildup, especially in the summer months when temperature swings are significant. A well-designed cover accounts for this from the start, not as an afterthought.
Bracket and Rafter Placement Matter More Than You Think
A bracket does more than hold things up – it transfers load. When your patio cover rafters rest on a ledger that is attached to your house, every bracket and connection point is part of a load path that leads back to your wall framing.
If the rafter-to-ledger connections are not properly secured, the structure can shift slightly over time. That movement opens up gaps in your flashing and sealant, which is exactly where water enters.
Using proper joist hangers, hurricane ties, or structural brackets ensures the roof stays rigid and the waterproof seals stay intact.
Pergola vs. Solid Patio Cover: Which Attaches Better?
A pergola is open by design – it uses a beam and rafter system with gaps between slats, so water passes through rather than running off a solid roof. This means the ledger-to-house connection on a pergola carries less waterproofing demand, but it still needs to be flashed properly to protect the wall.
A solid patio cover, on the other hand, functions more like an extension of your domestic roof construction. It needs correct pitch, full flashing, and potentially gutters to handle runoff. If your goal is full weather protection for your deck or porch, a solid cover is the better investment – but only if it is built correctly.
What Most DIY Installs Get Wrong
- The biggest mistake homeowners make is attaching the cover directly to the exterior wall without removing siding first. Fastening through siding creates a gap between the ledger and the wall sheathing, and that gap collects water like a trough.
- Another common issue is using screws that are too short to reach the structural framing behind the drywall and sheathing. Without solid anchoring into a truss, rafter, or stud, the ledger will not hold under load and will eventually pull away – taking your flashing with it.
- Finally, skipping a concrete footing for the outer posts is a mistake. Posts set directly in soil will shift. That movement cracks sealant and opens the entire system to moisture.
How to Attach a Patio Cover to Your House Without Leaks
Attaching a patio cover to your house without leaks comes down to three things: proper flashing, correct roof pitch, and solid structural connections. Cut corners on any one of them, and you are setting yourself up for water damage. If you want it done right the first time, the team at Build Strong Construction & Remodeling has the expertise to handle every detail. Learn more about our patio deck cover service or call us at +1-972-802-3107 to get started.